Creating a red blood cell brush in Photoshop by Annie Campbell
Intro
Drawing individual red blood cells (RBCs) in an illustration—especially when they are not the main focus of the piece—can become quite tedious and time-consuming. This is where I find using a pre-made RBC bush really speeds up my production process. This tutorial shows you how to create your own RBC brush and tailor it to your needs. Hope you like it!
Art fundamental tutorials
Listen to our Podcast
Illustration tutorials


STEP 1: CREATE A NEW PHOTOSHOP DOCUMENT
Any square dimension will do. I chose to work at a smaller size of 500×500 px at 300 dpi.

STEP 2: PAINT THE RBC IN GREY-SCALE
Start off with a custom shapes tool (see above) and create a grey colored ellipse. From there, paint different values to give the ellipse a bioconcave shape that’s distinctive to the morphology of a RBC (see below).

When creating brushes in Photoshop, it’s useful to remember that the black values will = 100% brush opacity and the white values = 0% brush opacity—in other words the white areas will become transparent. Everything in between, i.e. all of the grey values, will range from 1-99% opacity. I’ve avoided using white to highlight the curvature of the RBC here because you will end up getting really transparent parts to the RBC when you come to use the brush. See below for example:
STEP 3: DEFINE BRUSH PRESET
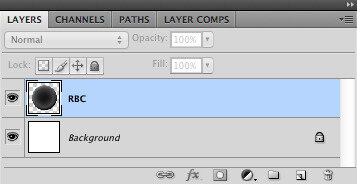
Now that you’ve gotten the RBC render to how you like it, select a layer. I found that if you select a shape or smart layer the next part won’t work.
To create a brush go to Edit –> Define Brush Preset


It’ll open up a dialogue box (see below). Give the brush an appropriate name, I’ve used “RBC” in the example:

Now if you go to your brushes panel, you’ll see your new brush that you just created!

You’ll probably notice that this does not look like RBCs. True. The following are a few suggested brush settings that might help you. First edit the spacing preset. Here I’ve chose 135% for my value. You’ll notice the RBC shapes more now.

To give it a more organic and varied look go to the Shape Dynamics settings and adjust the Angle Jitter, Roundness Jitter, and Minimum Roundness. My settings are: Angle Jitter = 100% Control set to Off Roundness Jitter = 48% Control set to Off Minimum Roundness = 25%

You’ll see that it’s starting to look more like RBC’s. You can stop here and tweak the spacing if you happen to be depicting RBC’s within a capillary vessel. If you want to depict RBC’s in an environment that’s not so compact as a capillary, then the next few settings should help you do the trick. In the Scattering settings, adjust the Scatter in both axes as well as the Count. My settings here are: Scatter = 426% Check Both Axes Control Off Count = 3

Now to add some color. I find that having slight variations in hue makes the RBC’s stand out and differentiate from one another. You can easily achieve this by going to the Color Dynamics settings and adjusting the Foreground/Background Jitter. My settings are: Foreground/Background Jitter = 100% Control Off In the color foreground and background panel, just set them to two different hues of red (see the small callout in the image below).
And that’s pretty much it. There’s definitely room for improvement but hopefully, this can get you started to creating your own RBC brushes.